
You have just purchased a Kemper Player, a Kemper Stage, a toaster or a rack version? Welcome to the Kemper users club ! More than 10 years after its launch, the Kemper Profiler Amplifier (KPA) remains a fantastic sound factory and has a gigantic library of sounds, available for free or in the form of paid packs from a large number of 3rd party rig creators. If you are starting with the Kemper – whatever the model you chose – the heart of the machine tone is based on profiles: I wrote two articles for the beginners, in order to understand the different types of profiles, their advantages and their disadvantages. This is the part I : understand the basics on Kemper profiles.
Kemper Profiling Amplifier : introduction
Systems based on amp modeling rely on a digital model to simulate the behavior and sound of an amp: designers of this type of models generally simulate the sound signature of the amp, the behavior of its distortion , as well as the main settings available, most of the time the bass/mid/treble settings (the famous “tone stack”), often the presence control, and sometimes the resonance control which generally controls the bass level of the amp. Some companies using this approach can go much further and model also more advanced parameters of an amp, such as the bias, the sag behavior, hum, etc…. The approach taken by the Kemper Profiler Amplifier is different and is based on capturing the sound signature of the amp and its dynamic behavior (distortion behavior and characteristics). This capture procedure makes it possible to generate a profile, which can then be further refined, by tweaking a certain number of parameters. And this profile is the basis of the sounds that the Kemper can (re)produce: the quality of the profile(s) will make all the difference in the sounds you can get from your Kemper.
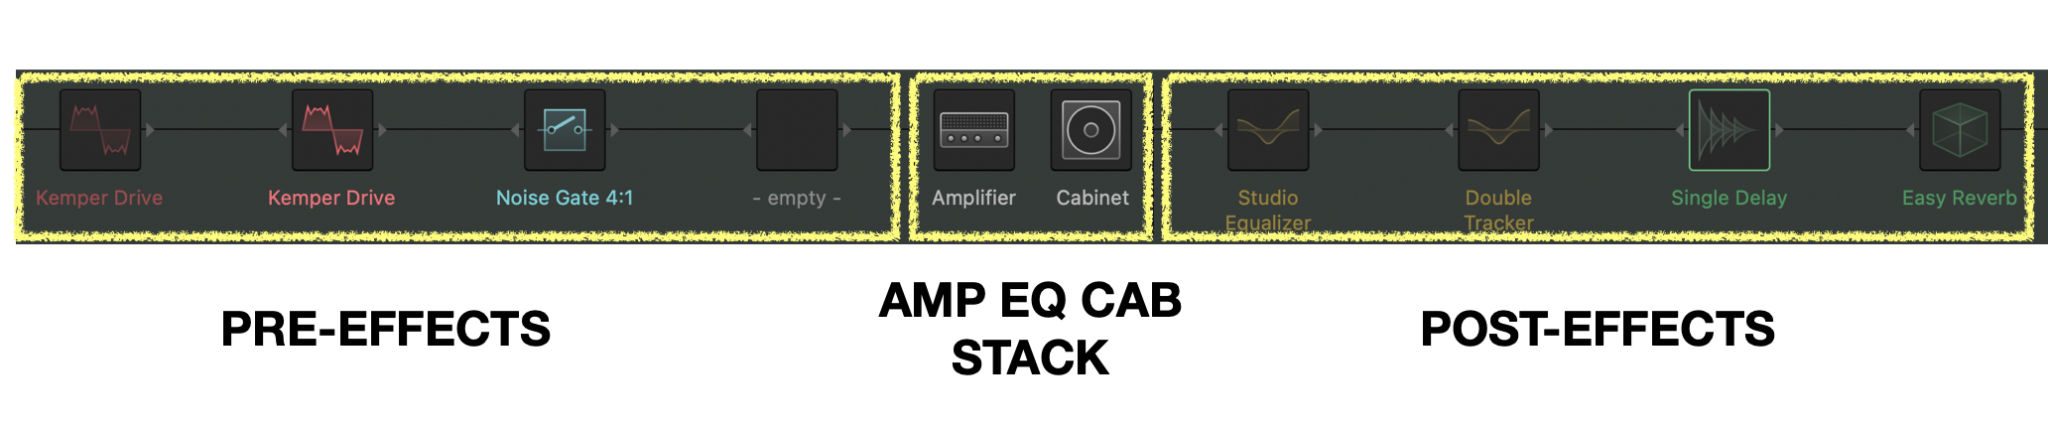
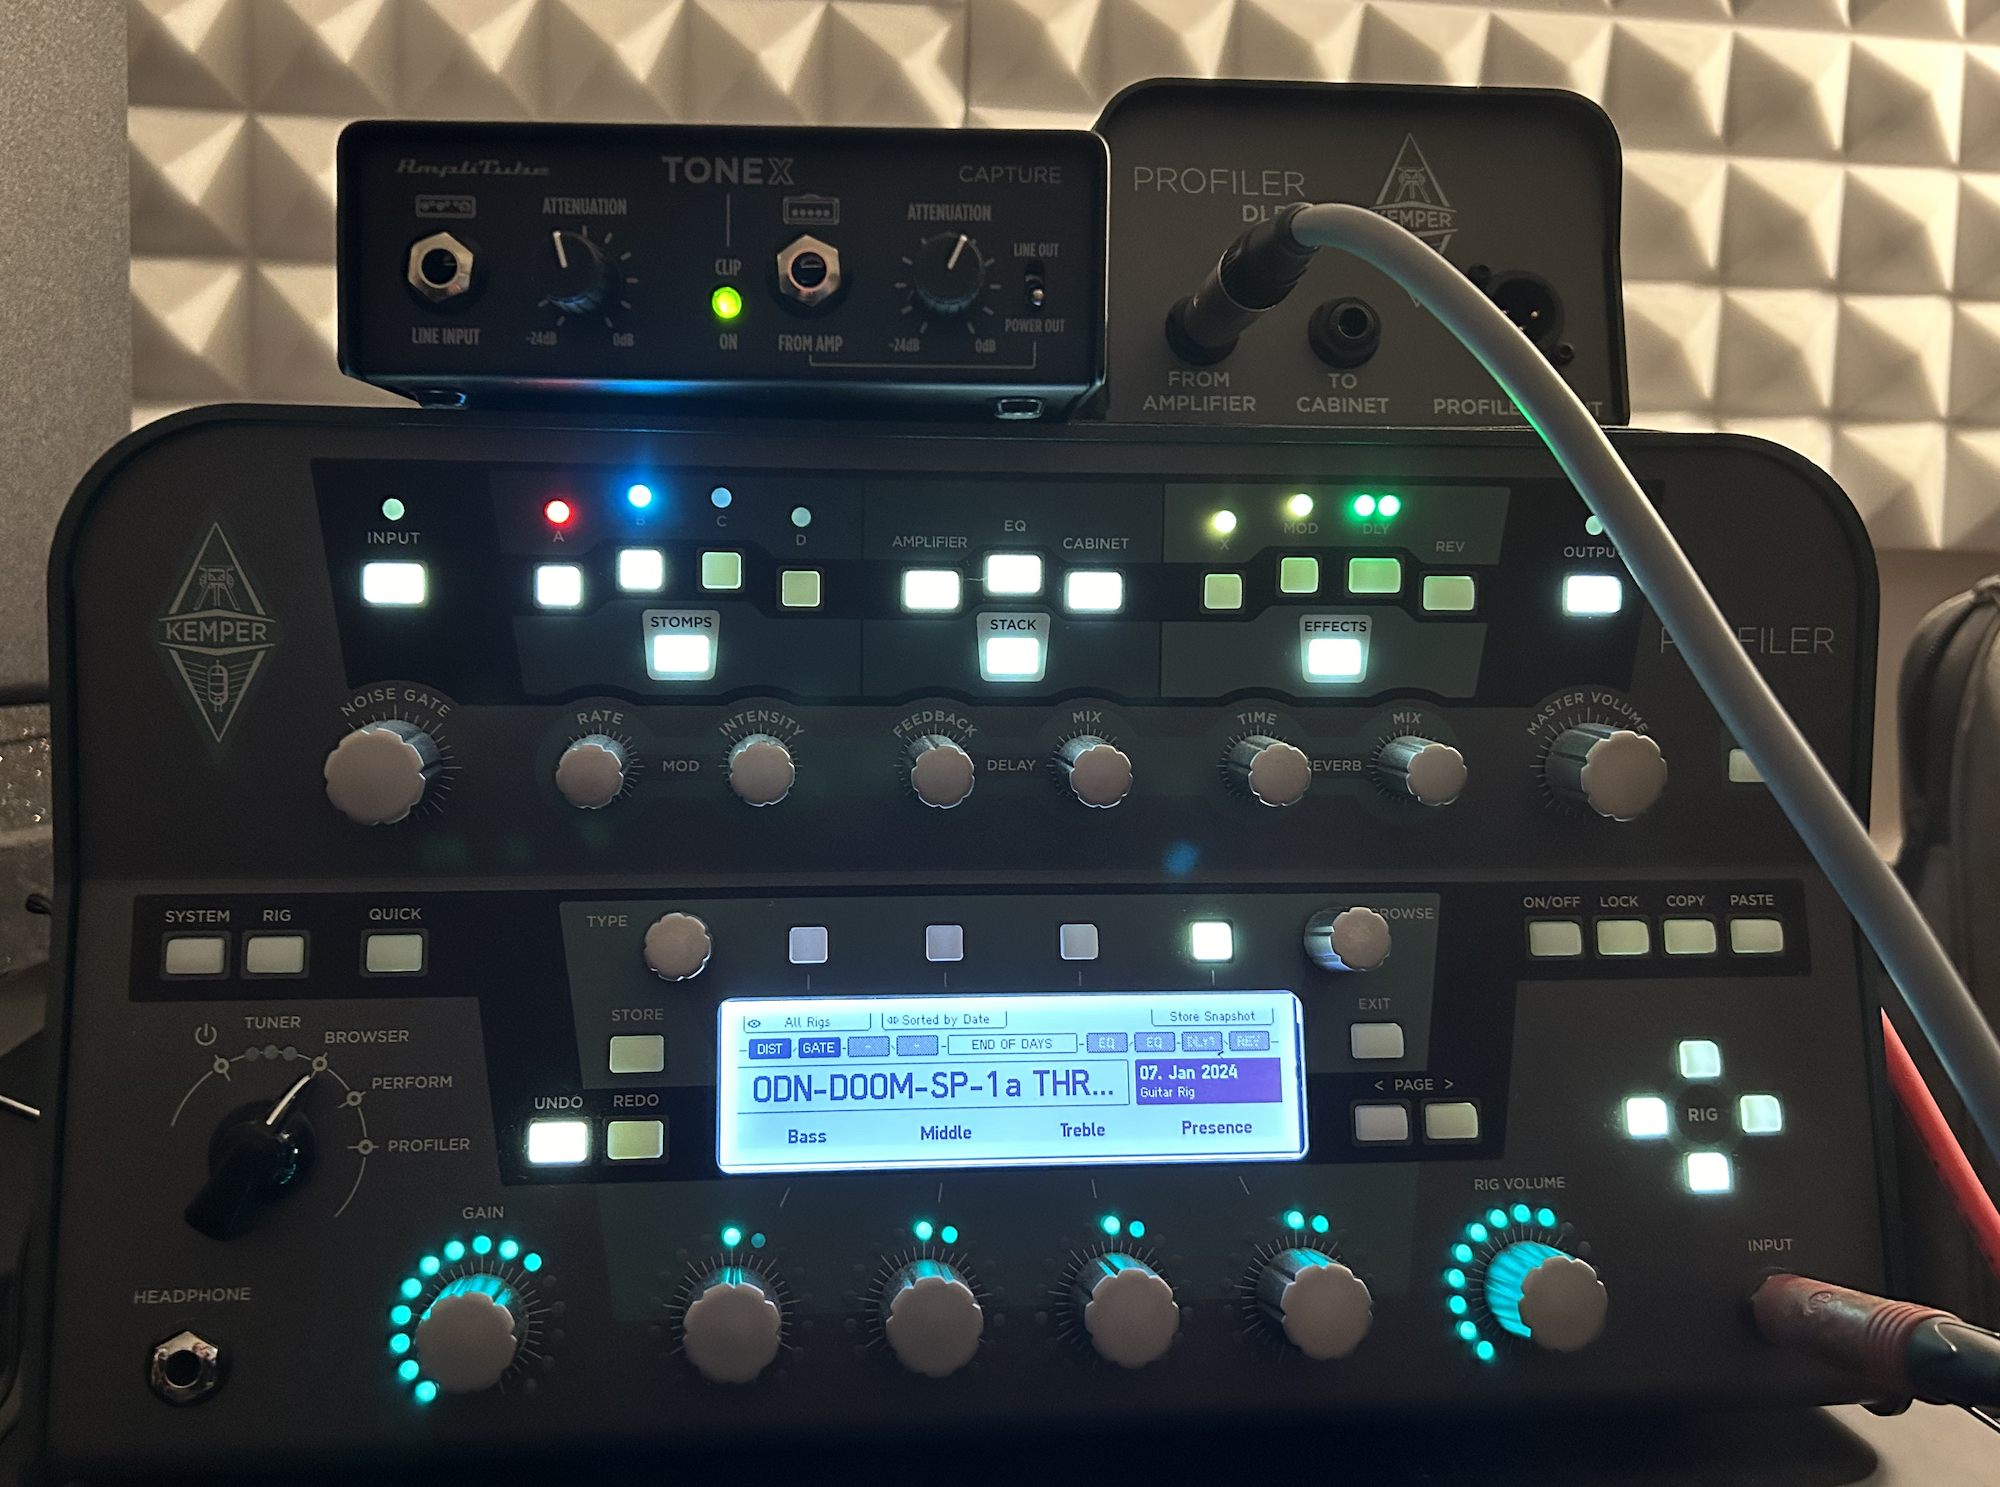
On the Kemper, a preset is called a “rig”: each rig is identified by its name and corresponds to a particular configuration of your Kemper, with a given profile and a set of associated effects and parameters.
A rig, as presented in the Kemper control application – the Rig Manager – is reproduced below:
The same block layout is also materialized by the arrangement of the front of the toaster or the rack versions of the Kemper :
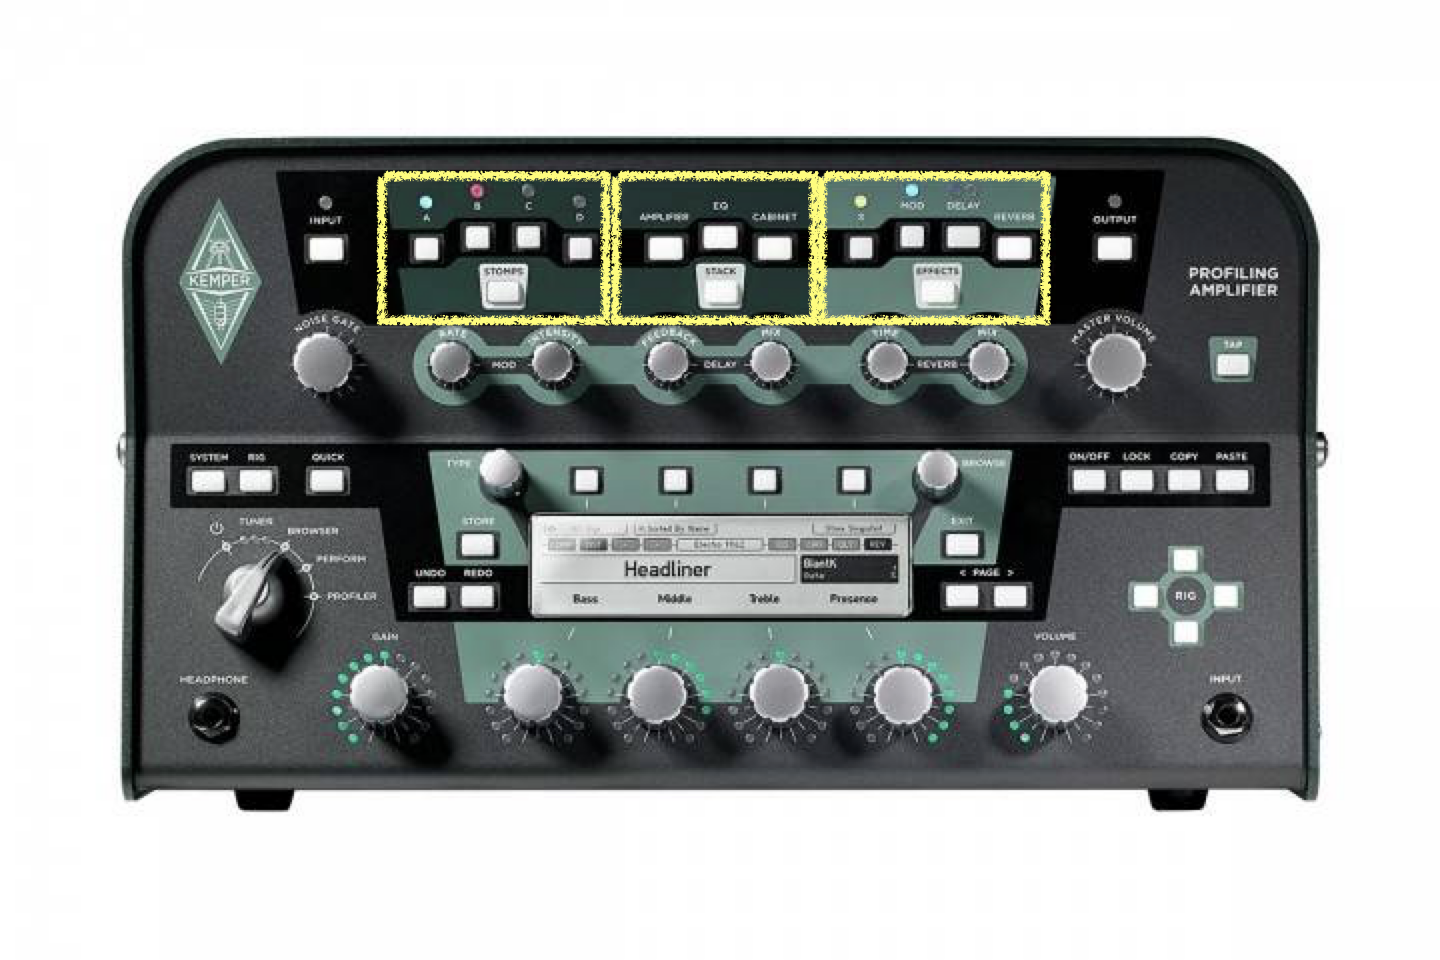
Note: the Kemper Player is limited to two PRE blocks and two POST blocks.
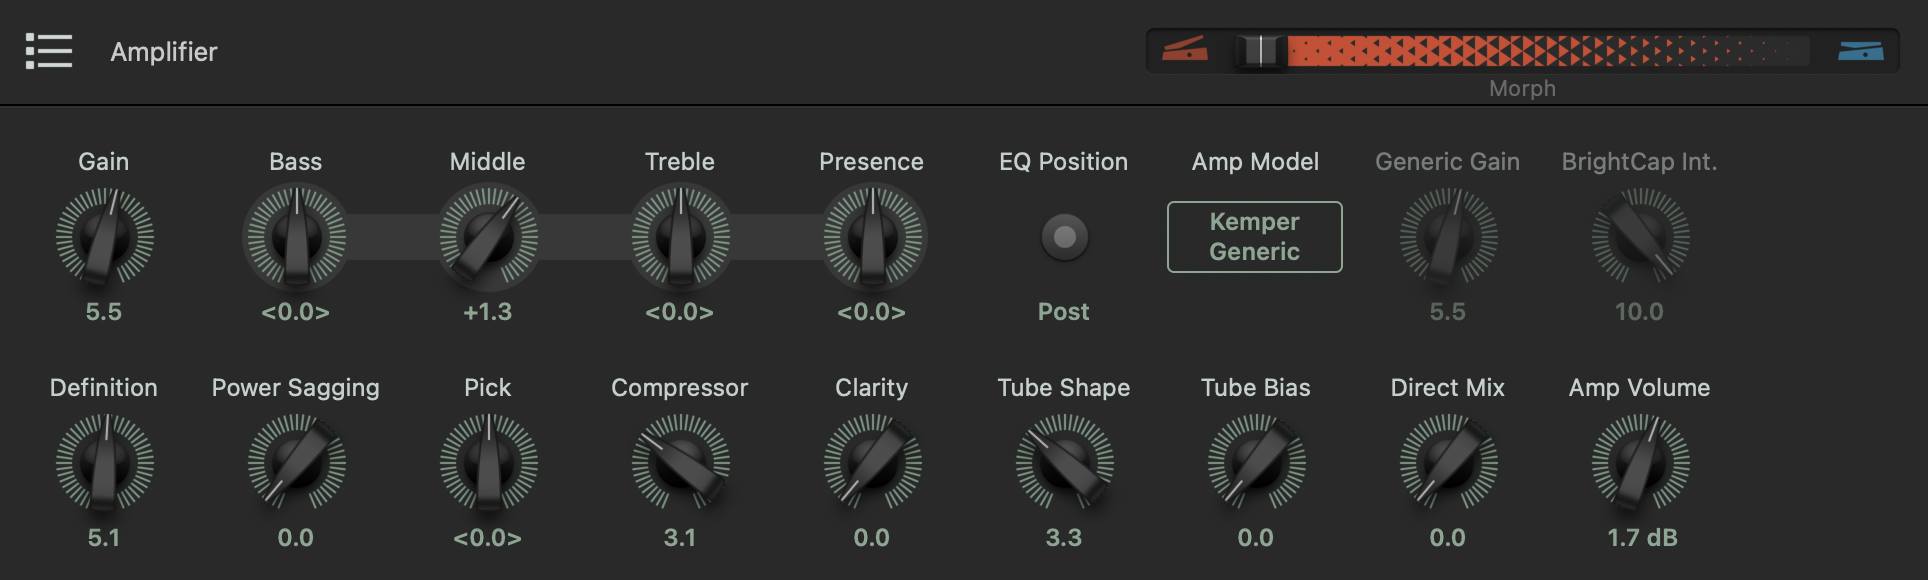
Kemper profiles are implemented through the two central blocks: Amplifier and Cabinet. The Amplifier block allows you to adjust the amp profiles and provides access to the gain control, the tone stack controls, as well as other more advanced profile parameters:
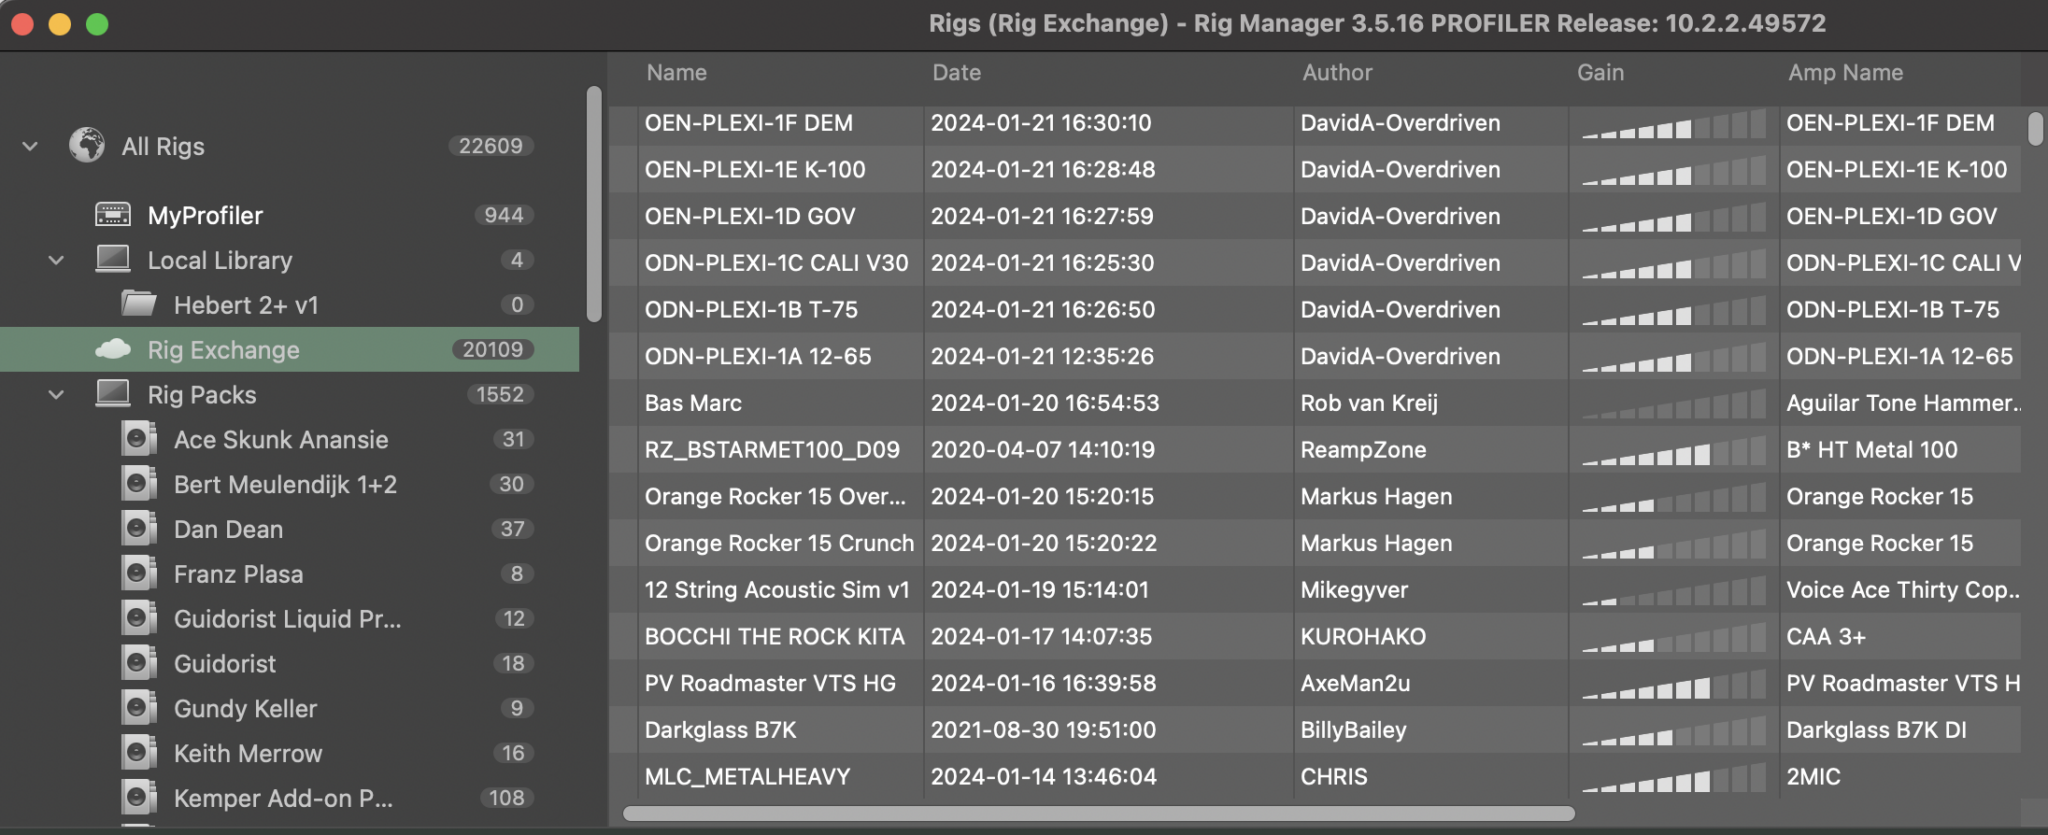
Each Kemper comes standard with a set of rigs covering clean, crunch and high gain sounds, with profiles of many different amps. You can enrich the range of sounds of your Kemper by making your own captures, by using those of the Kemper community via the Rig Exchange (directly accessible from the Rig Manager software or accessible at this URL: https://www.kemper-amps .com/rig/exchange) or by purchasing packs from many third-party suppliers.
It is interesting for the Kemper user to understand the differences between the different profile types: some of them are better suited for some specific configurations (for example using a real guitar cab with their Kemper) or certain configuration customizations (e.g. modify drastically the tone stack settings, swapping the cab block or using an impulse response).
The profile types
There are 3 main types of profiles with the Kemper: studio profiles, direct amp profiles and merged profiles.
Studio Profiles
A Studio Profile consists in capturing a complete rig : at the minimum an amplifier, a cabinet and a microphone, in order to achieve a specific and self-sufficient tone. These profiles make it possible to obtain a complete and “authentic” sound, or, let’s say, a sound that is consistent with the intention of the person doing the capture.
With this type of profiles, the Kemper uses a proprietary algorithm – called “Cab Driver” – which separates the sound of the amplifier from that of the speaker: the Kemper will use an (intelligent) approximation to create a profile of the amplifier and a profile of the cabinet, from a single global capture.
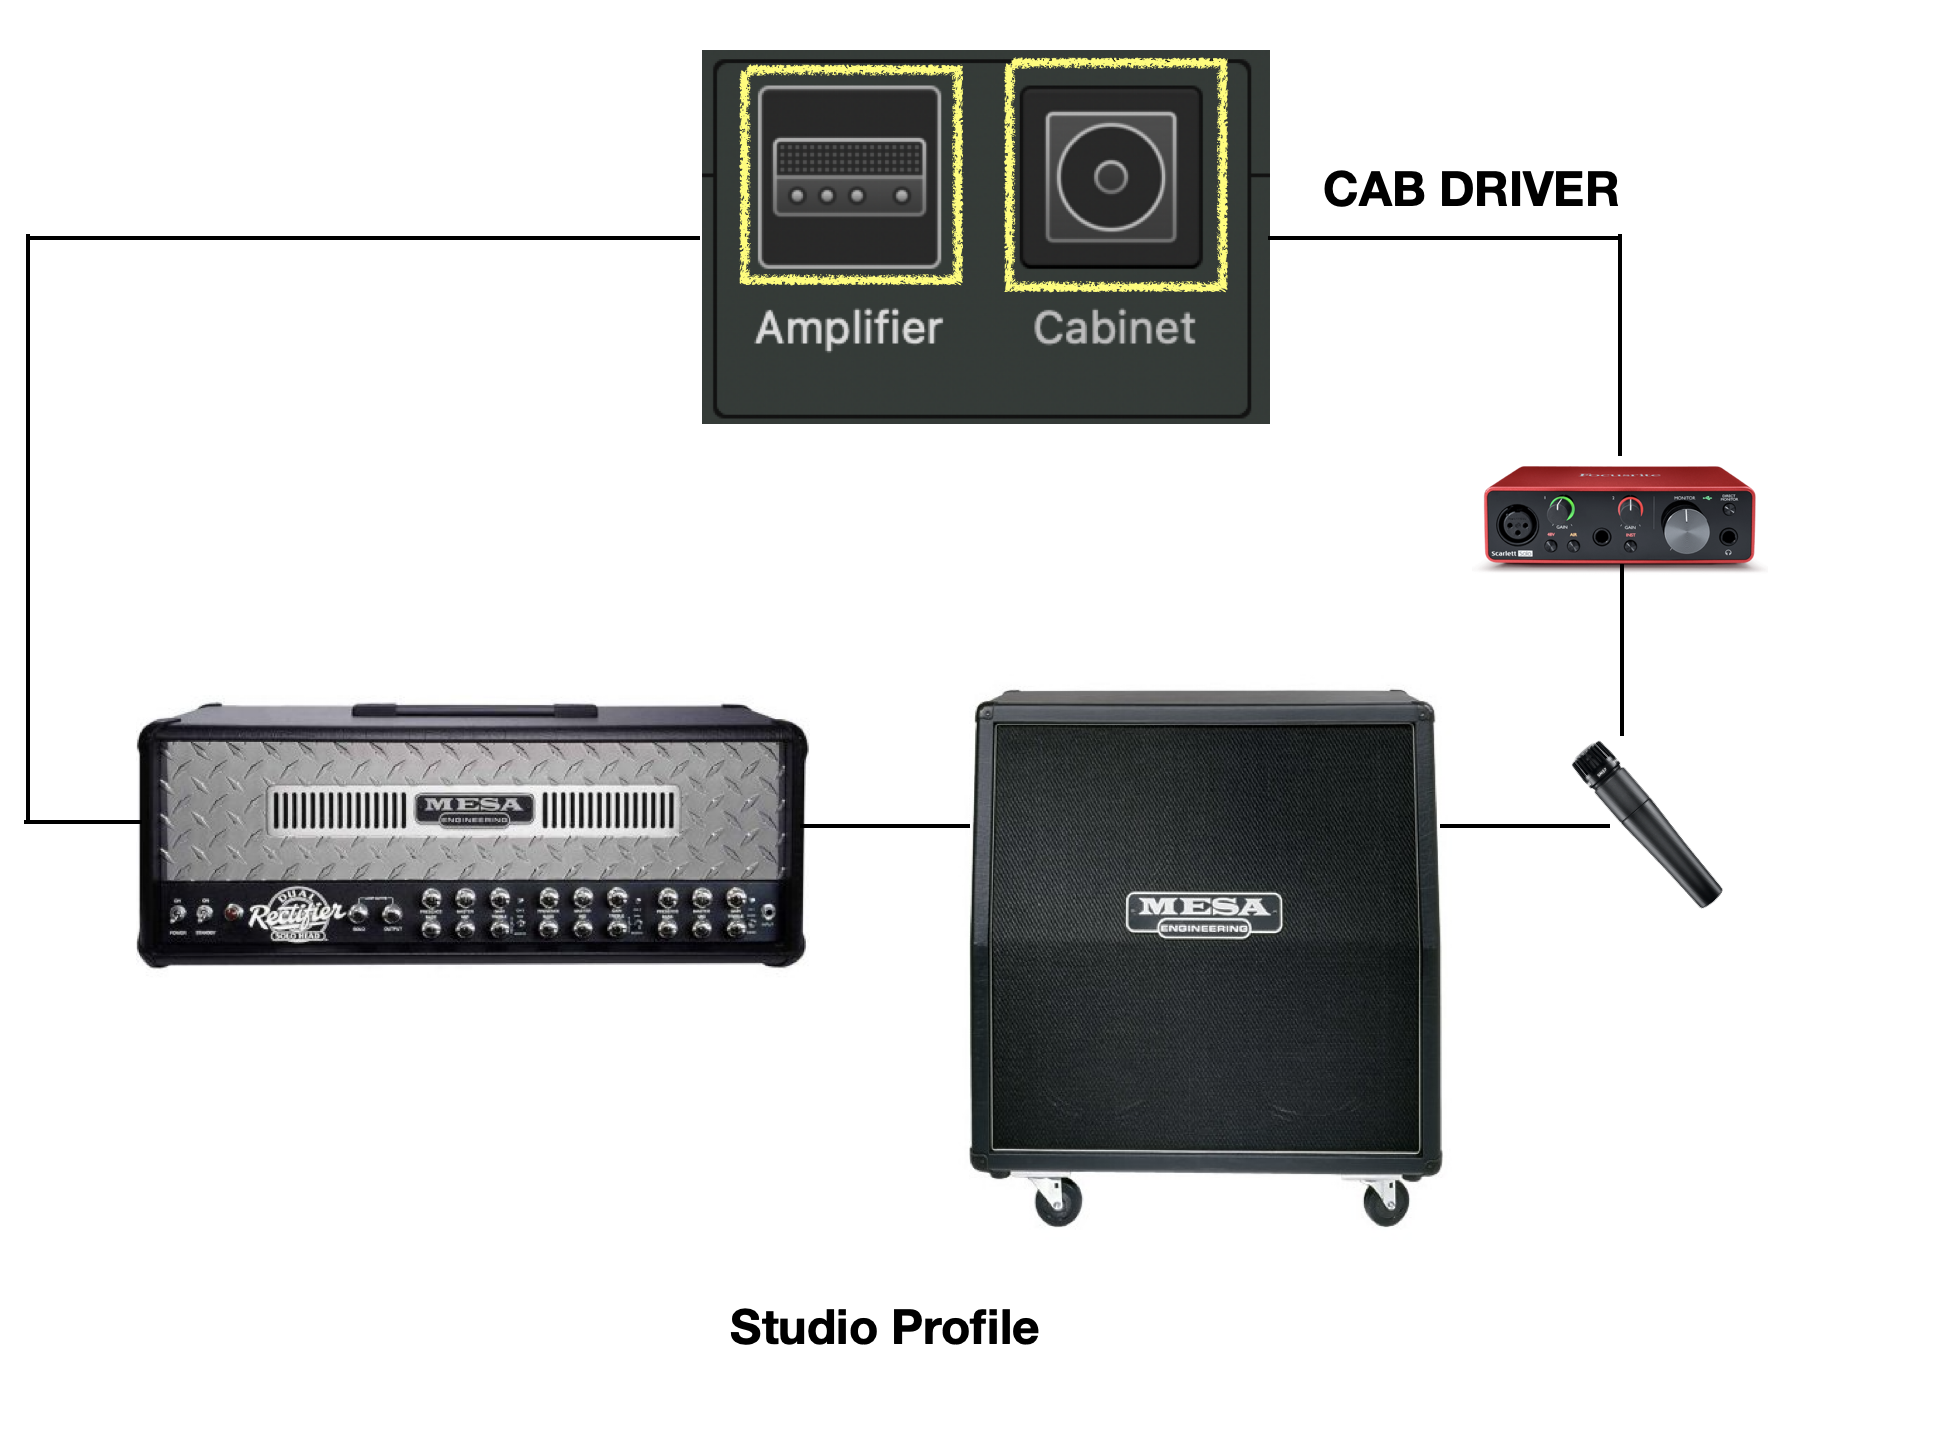
These studio profiles also quite often include boosts or overdrives in front of the captured amplifier, in order to embed the effects of analog stomps and capture the complete sound.
Many profiles available on the Kemper are made using this studio profile approach and many of them give excellent results.
The amp/cab separation, however, remains an approximation: as long as you don’t disengage the Cabinet block or you don’t want to swap it to another cab, these profiles can give excellent results and can be used as is.
For more precision and flexibility, we can also leverage the two other types of profiles : the direct amp profiles and the merged profiles.
Direct Amp Profiles
This type of profile is meant to capture only the output of the desired amplifier (without the cabinet part), to obtain a better level of accuracy in the Kemper amplifier block. In this approach, you will need to use a DI box or an equivalent to capture the amplifier output signal:
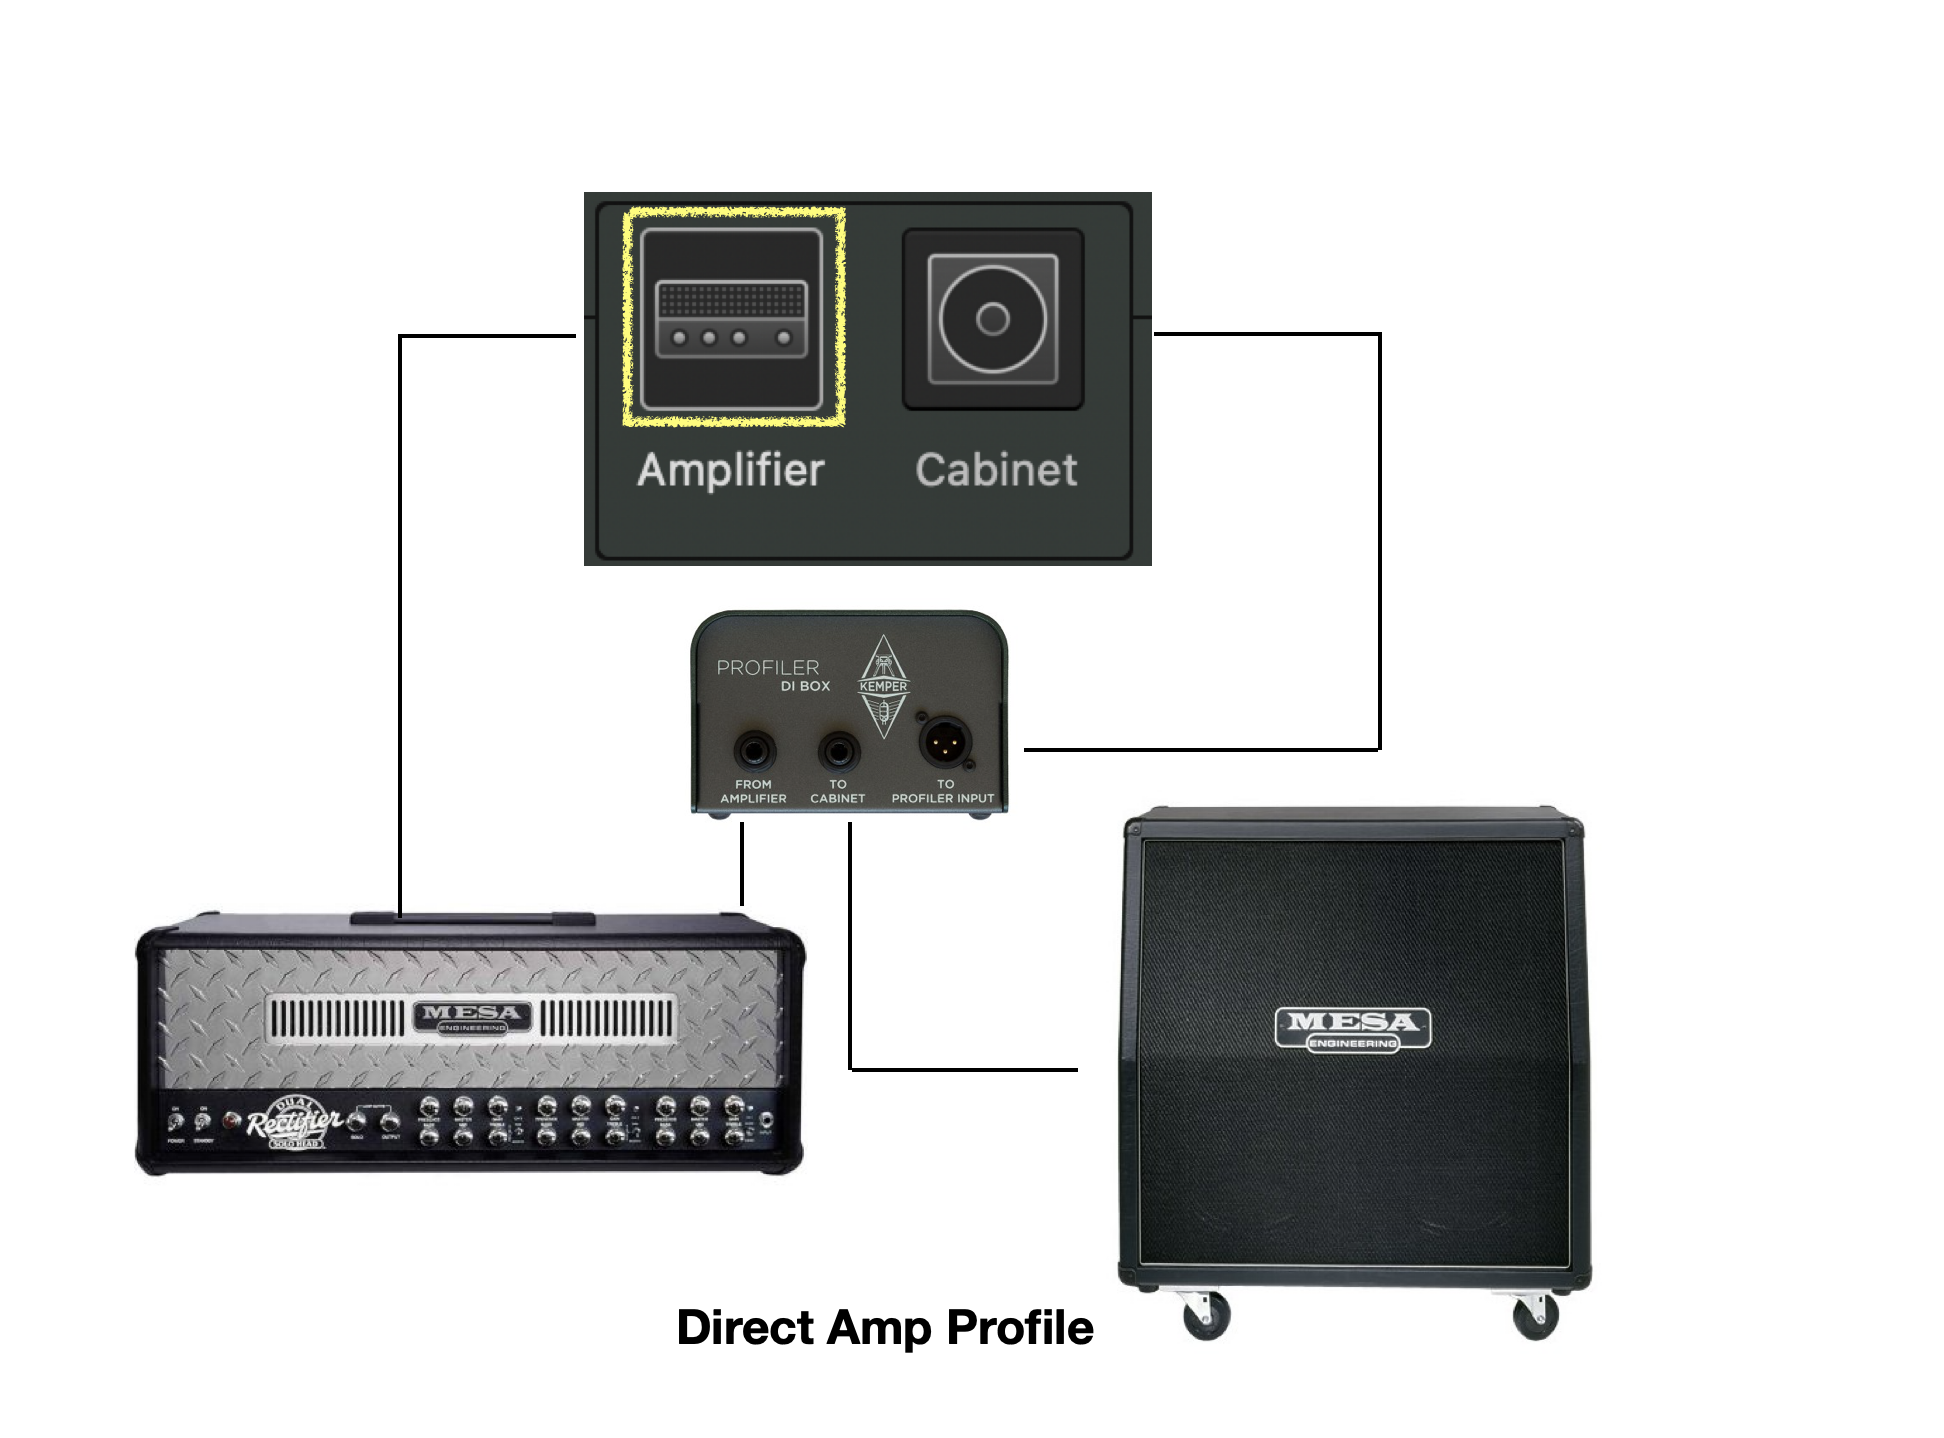
Here the capture procedure feeds only the amplifier block, with an amplifier-only profile (without the cab). These profiles in the Kemper are meant to reproduce the complete sound signature of the amplifier including the preamplifier stage as well as the power stage.
This type of profile can then be completed either by a cab block coming from another profile, or with impulse responses. You can also merge a Studio Profile with a Direct Amp profile: this is the third type of profile, presented in the following section.
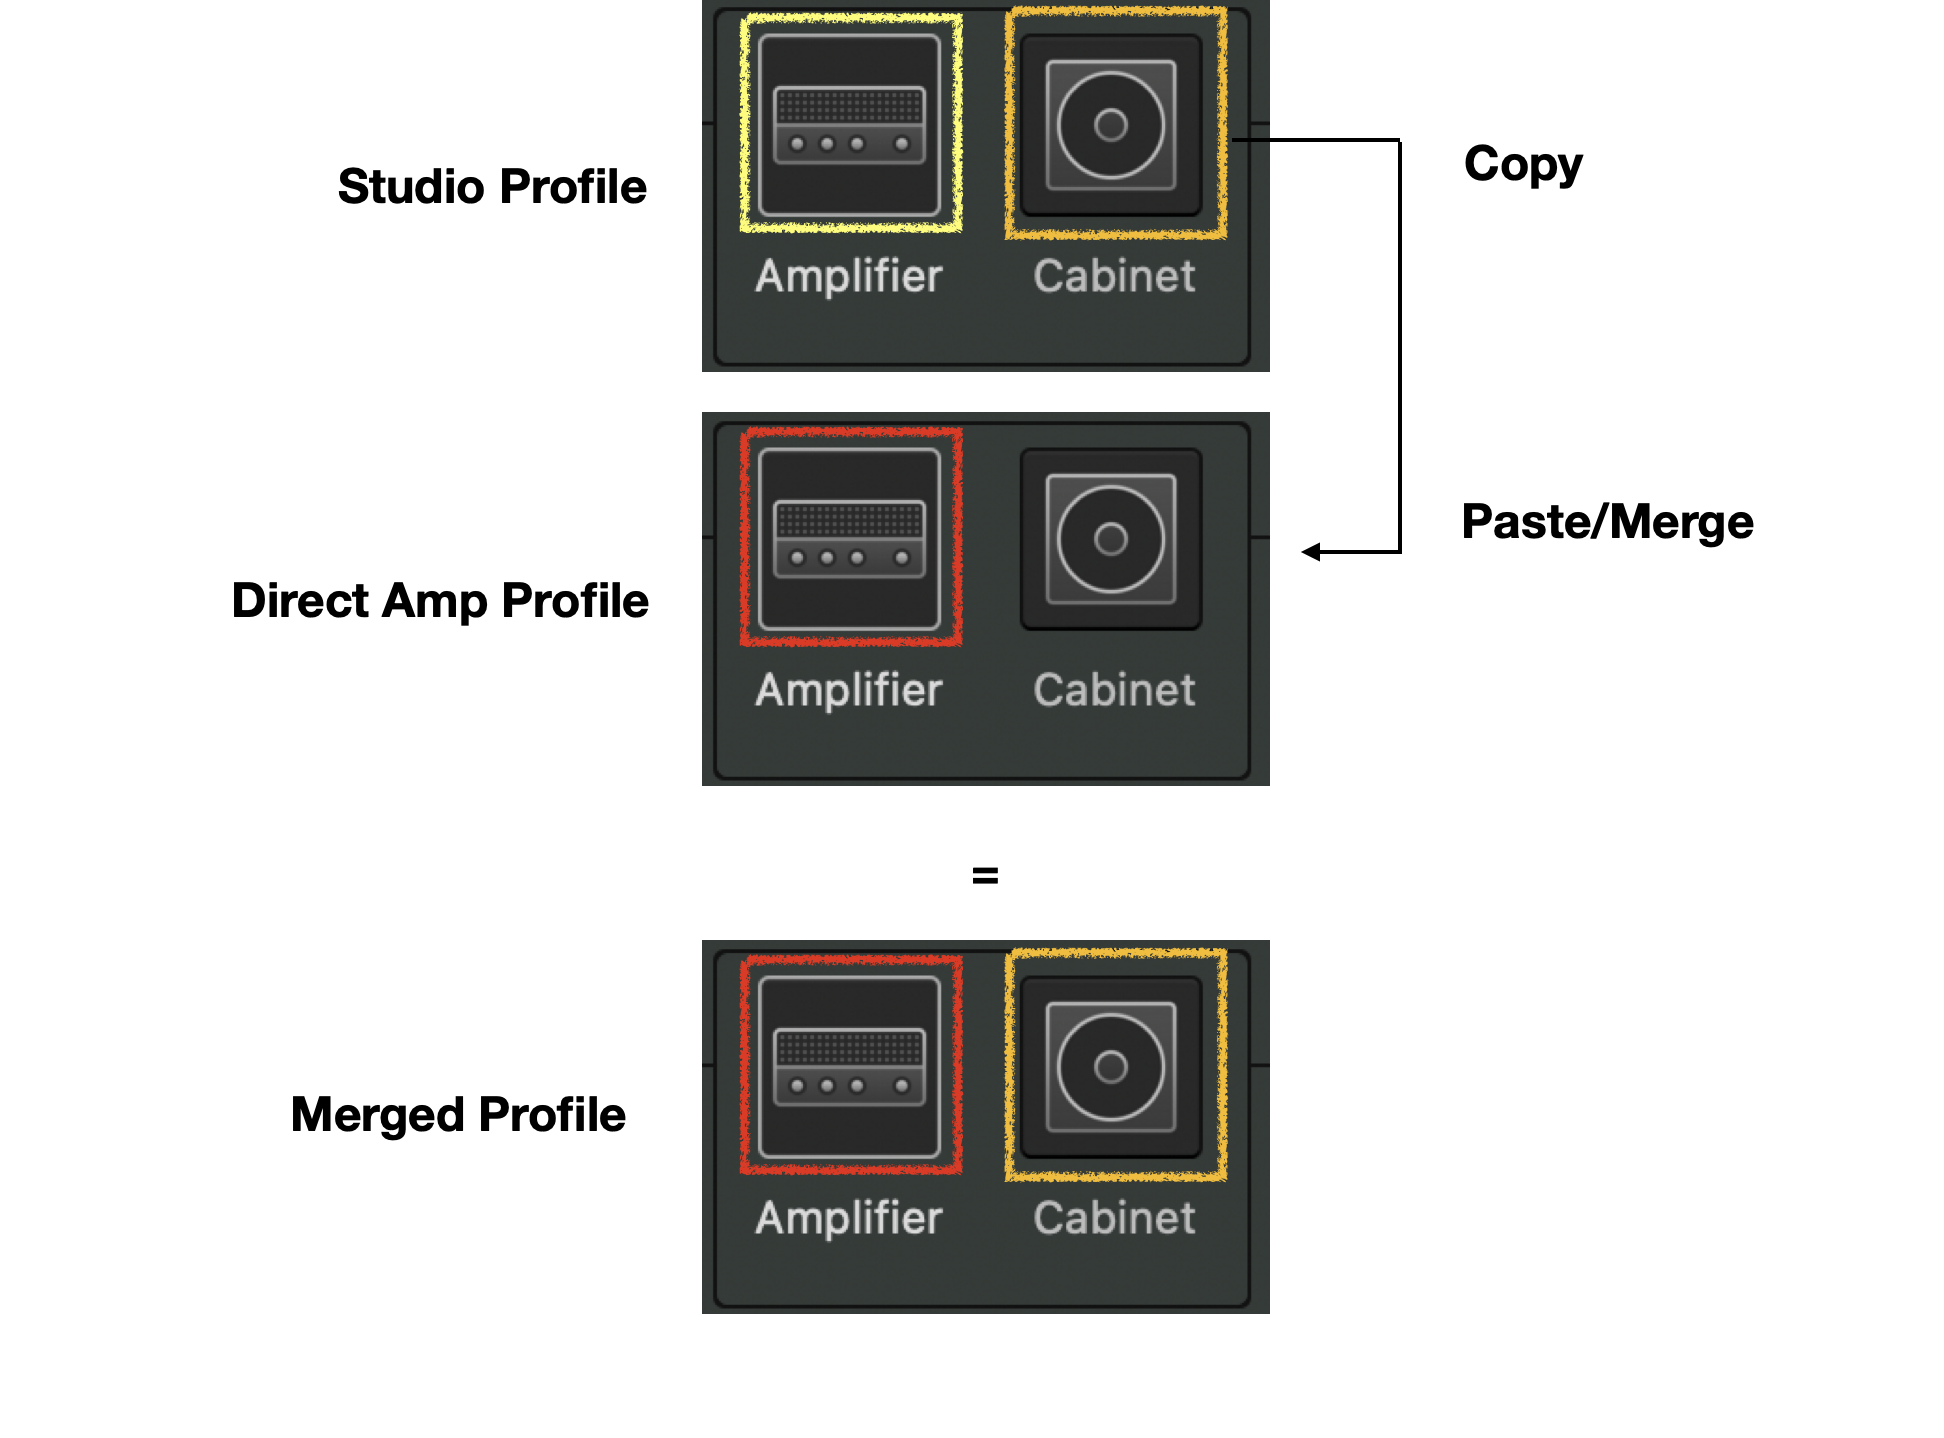
Merged Profiles
This type of profile combines the two previous types of profiles: ideally, two captures are used, one to create a studio profile and one to only get the amp, scrupulously keeping the same parameters on the amplifier for the second profile. We can then merge the two profiles by a copy/merge operation of the cabinet block into the direct profile: the overall result is identical to the studio profile, but the amp block is more realistic and more accurate. The merged profile will give better results if you want to adjust the amp parameters, replace the cab block (either with a cab block from another Kemper profile, or through an IR) or disengage it to play in a real guitar cab, or to use imprints with the Kemper Kabinet (see my review of the Kemper Kabinet here if you want to learn more about this).
Conclusion
Profiles are at the heart of the sounds produced by your Kemper and many studio profiles give excellent results. If you want to customize your rigs or play with a real guitar cab, go for merged profiles, as they are the most flexible and will generally give better results when you modify them. If you want to use your library of IRs, use either the amp block of a merged profile or a direct amp profile. In any case, you can use the tone stack and complement the profile, using boosts and overdrives in the PRE section as well as delays, reverbs and other modulation effects in the POST section.
In summary :
- Studio Profiles: authentic sounds, ready to use, not the best support for sound customization/cab block replacement.
- Direct Amp Profiles: precise amp model, needs to be associated with existing Cab blocks, Cab Presets or IRs.
- Merged Profiles: authentic sounds and precise amp model, best support for changing the cab block, using IRs or playing in a guitar cab.
Part 2 will present Liquid Profiling, introduced last year by Kemper.
Leave a Reply