Updated 10/22/2023
Introduction
The previous post (part 4) presented the power amplifier section of IR loaders, which are very interesting to get a more realistic sound from your gear, especially when using preamp pedals or the FX send connection of your amp.
If you do not own a guitar tube amp, or never had the chance to use one, you may not know the sound signature that the power-amp sections deliver (and even if you own one, you may not have spent time investigating this very specific area). The thing is that if you find yourself using IRs with preamp pedals and you don’t really know what to expect in terms of sound change/impact from the power amp simulation, you may either ignore it or spend time wondering if your settings are correct or realistic, and learning how to use this section -as a beginner- will become a more or less frustrating exercise…. In the end, it might not be that important : as long as you get a sound that pleases you and suits your need, who cares if it is “realistic” or not ? You can always try / adjust / try …. and end-up with a sound that you enjoy. However, if you are curious or in search of “absolute realism” (!!), I am introducing here a new kind of IR to experiment with : IRs that are reproducing the power-amp sections of guitar amps (you will need to stack them with regular Cab IRs in order to be able to use them). At the end of the post, we will introduce also an additional weapon : the exciter module of Two-Notes Wall of Sound.
Power-amp IR ? What’s that ?
A power-amp IR can allow you to :
- get closer to the real sound of an actual guitar-amp, by using it’s real signature
- to listen and learn about how this section impacts the overall sound that you get
- to obtain a reference point or starting point that may help you using power-amp simulations and / or adjust your EQ settings
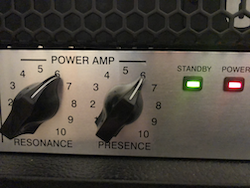
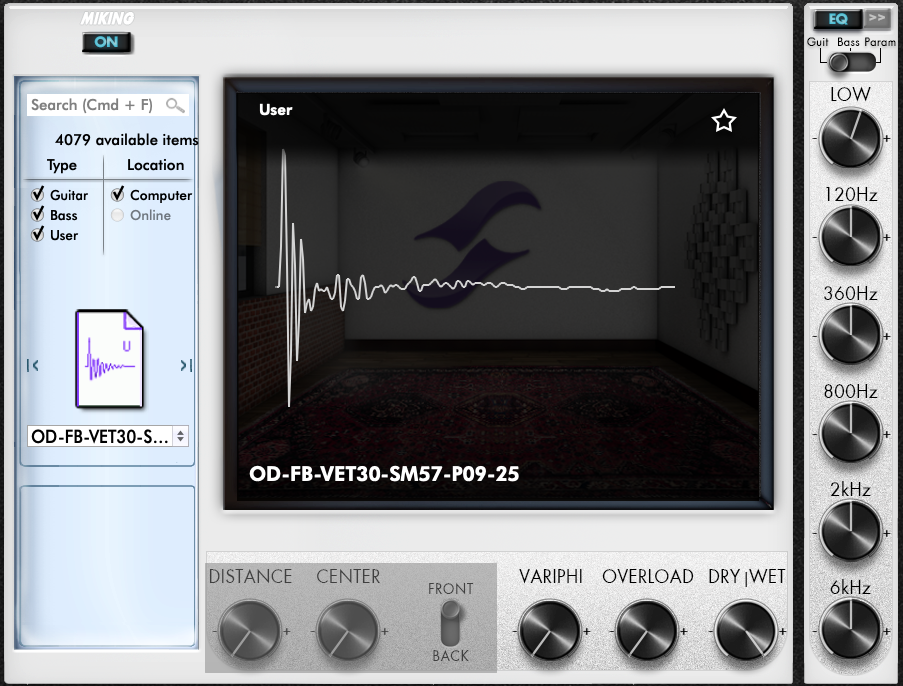
The main audio samples in this post are using the power amp section of a Peavey 6505 (6L6 tubes), with the resonance set to 60 (out of 100) and the presence set to 60 (out of 100). The signal chain uses an OD9 , and a Revv G3. The guitar pickup is a DiMarzio Dominion, and the small random riffs are in Drop C#. The guitar cab IR is based on a Zilla Fatboy, loaded with a WGS Veteran 30, with an SM57 in position 09_25 (see explanation on positions on this page).

The cab impulse response is loaded in Wall of Sound :
In the first sample, the signal chain is : OD9 -> Revv G3 -> Peavey 6505 Power Amp R60P60-> Torpedo Reload -> Logic Pro X -> IR Fatboy Vet30.
Sample 1
In sample 2, the 6L6 power section is removed and we have : OD9 -> Revv G3 -> Logic Pro X -> IR Fatboy Vet30
Sample 2
The signal has become clearly drier, with less resonance. By listening to the sample with a neutral device, you will notice a more artificial and “flat” tone (less obvious with computer speakers or telephone earphones) :
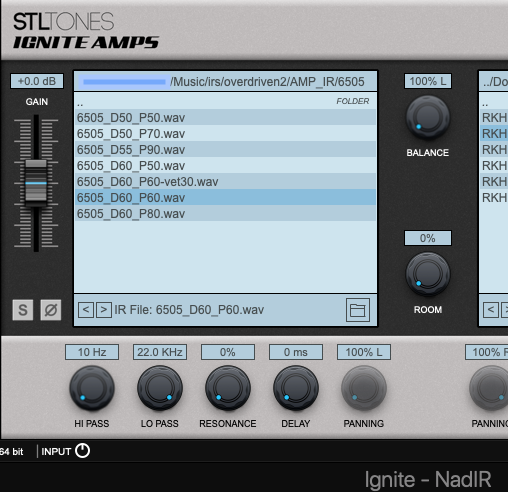
On the next sample (sample 3) an additional impulse loader is configured : it is using an IR capturing the power-amp section of the Peavey 6L6. We are using otherwise the same settings as the ones used in sample 1. In this example, we are using Nadir , with an instance placed before the Wall Of Sound plugin. The signal goes to the 1st loader (6L6) then to the 2nd (Fatboy IR).

Here is sample 3:
Sample 3
While this sample is a little bit less loud than the first one, you should be able to find that the tone has regained some resonance, and that the treble are less harsh or synthetic.
Alternatively, you should be able to mix directly the two IRs directly in wall of sound (WOS can load and mix a virtually unlimited number of IRs) and you should be able to get comparable results. Whatever the technique (2 loaders or 2 IRs mixed within 1 loader), you will have to adjust the level of each IRs. For example, if you load them in one single loader, start by lowering each IR volume by -3 or -2 dB.
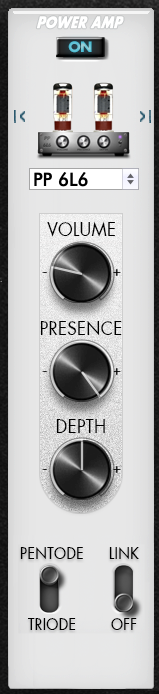
In sample 4, the power amp IR is removed and the Wall of Sound simulation is used instead (6L6PP). By tweaking a little bit more the params, one should be able to get even closer to the original sound : but you get the idea, you will end-up with a tone with the same characteristics (more resonance, less treble hardness).
The parameters used for this example are presented in the screenshot below. The output level was lowered to compensate the augmentation of volume coming from the amp simulation.
Here is sample 4 :
Sample 4
This power-amp IR technique may give you varying results, more or less useable, and more or less realistic, depending on the power-amp IR itself, your signal setup (it should work by using 2 loaders, put in serial in the signal path), the Cab IR and the distortion you are using (preamp, distortion pedal).
Guitar cab IR producers usually try to capture the IRs in the most neutral way possible, so that they get mainly the tone from the speaker and microphone and not the one from the amp used for recording (or the least amount they can). The idea is then that your own gear will be able to go through and put its own footprint to the signal chain, without being altered or coloured too much by the original recording equipment.
The free IR available on this website are using a guitar amp for IR capture (with 6L6 valves) : they are “less neutral” compared to IRs available from other vendors or providers. They are scooped, in a very similar way to the picture presented in the exciter section below. Is it better if IRs are neutral or already colored ? I think there is no absolute answer to this question and it is rather a matter of purpose and objectives : for distorted sounds, less neutral IRs might provide you some interesting material and bring you faster into your favorite sonic territory…. So they might actually be very interesting for metal sound. Some IR providers have been using the same approach (I guess basically because what they could use was …. errr… a guitar amp). For example, Wilkinson audio offers a set of free IRs created with the power section of a 6505+, with and without a TS9….
A few additional samples
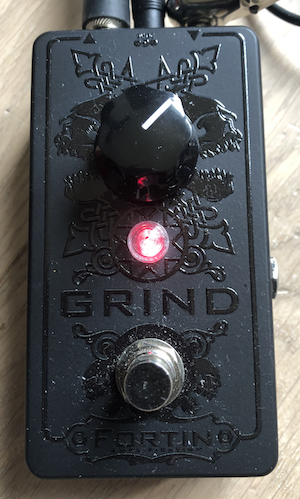
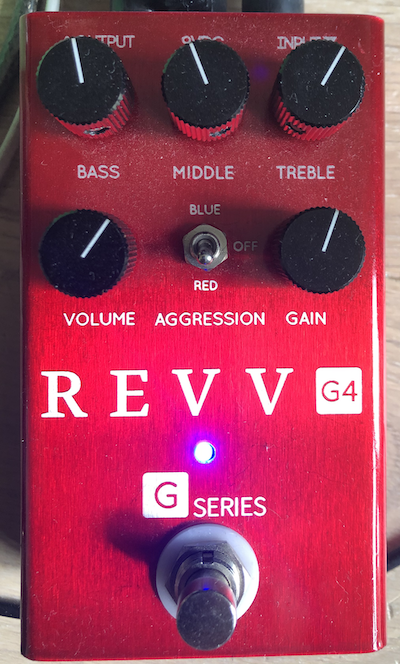
To illustrate a little bit further the impact of the power amp section on the guitar sound, here are additional samples created with a guitar in DropA#. The signal path is : Seymour Duncan AHB1, a Fortin Grid pedal then a RevvG4.
The cab IR used is a custom Overdriven.fr IR : a Mesa Boogie Recto 212, recorded with an E906 in position 12.
The WOS eq is set like this (HPF at 115 Hz):

The samples are using :
- Sample 1b : Grind / G4 / IR Cab Mesa (no power amp)
- Sample 2b : Grind / G4 / IR 6505 Res. 60 Pres. 60 (6L6) / IR Cab Mesa
- Sample 3b : Grind / G4 / IR 6505 Res. 60 Pres. 80 (6L6) / IR Cab Mesa
- Sample 4b : Grind / G4 / IR 6V6 20W / IR Cab Mesa
- Sample 5b : Grind / G4 / IR EL84 15W / IR Cab Mesa
- Sample 6b : Grind / G4 / IR KT77 Res.50 Pres.50 / IR Cab Mesa
Sample 1b
Sample 2b
Sample 3b
Sample 4b
Sample 5b
Sample 6b
On non neutral or transparent speakers or headphone, you may have to raise the volume a little bit or to eq a little bit (lower the low-end) in order to get the differences, but there are actually huge differences in these samples 😉
Conclusion : the impact from the power-amp is really important, as it brings more relief (resonance) and treble is globally less harsh. Of course, the presence setting on the amp will have a big impact on the overall sound.
Here is a screenshot of logic pro EQ showing the sound with 6L6 (RED) and EL84 : more bass/low-medium from the 6L6, a little bit more brightness from the EL84….

Limits
Actually, this power-amp IR approach has limits and drawbacks : you need two loaders to make them work correctly, and they are static, so you will need to change IR in order to go for more resonance, less resonance, more treble, less treble…. The power-amp simulation will be more handy as they offer parameters to tweak and adjust your settings. For example, they are built-in in Two-Notes software and hardware and in Mooer hardware (Mooer Radar for example). On these pedals, you can’t use the serial approach, and the Mooer can only load 1 IR at a time….
Exciter ?
We are not changing the topic of the article : it is still about coloring and adjusting the tone :), we are simply introducing an additional and interesting weapon….
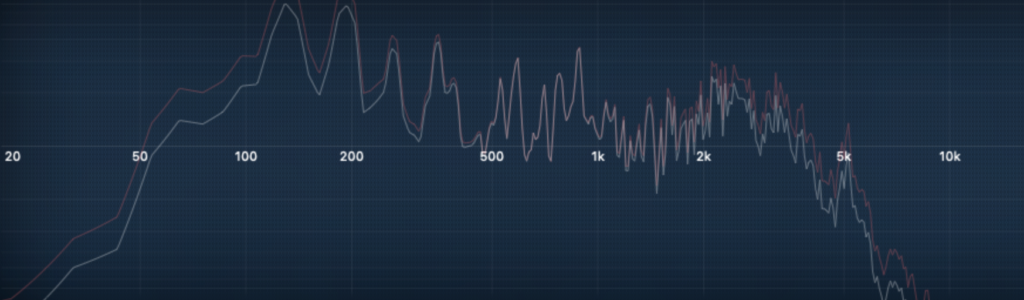
Let’s have a look on the profile of a 6L6 (6505) power amp capture under the Apple utility:
Volume is louder on the left (bass area, approx 50 Hz to 200 Hz) and louder in the high-medium and treble area (and scooped in the medium).
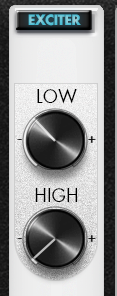
As an additional option, we can leverage the Exciter module from Wall Of Sound : this module has two knobs that behave a little bit the way of the presence and resonance controls of guitar amps do (there is no roll-off, though).
For the bass section, the exciter will increase the volume in the bass register : more increase at the bottom of the sound spectrum, and less and less as it moves up to 1 KHz. The treble section will act the same, in the opposite way : it will boost treble on the high register, and the boost will decrease as we move down to 1 KHz (approx.).
If you look again at the 6L6 capture profile, you should start noticing some similarities : the curve you will get from the exciter will never exactly match the one from (this) 6505 but the effect on the tone will be interesting.
Here is our sample 5 for the G3 pedal, with the same cab IR, but no power-amp or power-amp IR (bass set to 46% , treble set to 8%).
Sample 5
Do not jump to the conclusion that a 6505/6L6 can be simulated with an exciter set like this ! But the exciter can compliment or be a simple alternative to the amp simulations in many situations. With some preamp pedals, it can be enough to create a tone that you will enjoy. And of course, you can mix power-amp sims and exciter the way you want…
To get a better view of the effect, take a look to the screenshot below : white is left channel (exciter off) and red is right channel (bass and treble exciter 50%)
The last sample (sample 6) reuses sample 1 for the left channel and sample 5 for the right channel.
Sample 6
A similar control exists under Nadir (2.x) for the bass section : it is labelled resonance.
Conclusion
If you are looking for realism or authenticity (! in your distorded tone !), you can use this power-amp IR technique with a computer and a DAW.
If you are a beginner looking for references or a starting point, you can experiment with these IRs on your own gear, and compare the results with the ones you get from your power-amp simulation settings. See at the bottom of the post for download information.
As an alternative or a complement, you can leverage the exciter module to bring bass and relief for IR that are too “skinny” or boost the treble and infuse life to “flat” or “dull” IRs.
Another option to look at : take a listen to the free God’s cab pack from Wilkinson audio, captured with a 6505+ with various settings. You will be able to get different flavor of tones and see how the power-amp settings impact the tone : https://wilkinsonaudio.com
Continue Reading
Previous post : Impulse responses : part 4 (using pedals)
Next post : Impulse responses : part 6 (usage advices)
Addendum : playing with POWER AMP IRs
If you want to experiment with the power amp IRs , I suggest the following setups :
For players using preamp pedals :
- Guitar -> overdrive -> preamp or distorsion pedal -> sound card
- in your DAW :
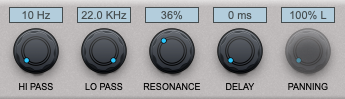
- An IR loader for the power amp IR (I recommend Nadir as the HPF and LPF will allow you to easily tweak the IR)
- Then your favorite CAB IR loader (with amp sim OFF)
For players using amp sims and going directly DI to their sound card :
- sound card DI
- Overdrive sim if needed
- Amp sim with the capability to TURN OFF the power amp section
- An IR loader for the power amp IR (same advice as the one above)
- Then your favorite CAB IR loader (with amp sim OFF)
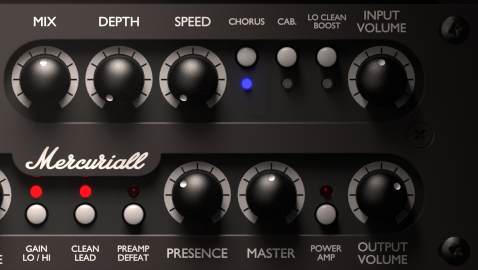
For example, here is the DAW signal chain with a Mercuriall U530 plugin :
On the Mercuriall plugin, the CAB and the power amp are turned OFF :
The power amp IRs from our IR pack were captured with different levels and have more or less “meat”: you will need to adjust the power amp volume levels to achieve good results. Using Torpedo Wall of sound as the CAB IR is really handy in this situation as you can adjust the out level from Nadir by monitoring the input level on WOS and set an approriate level. I tweaked that level from –1 or -2 db for the 6V6 IRs to +4 db for the KT77 IRs.
You may experiment hiss or boomy effects from the power amp IRs : using Nadir can allow you to quickly tweak the results by playing with the HPF and LPF filters. I suggest you start with HPF set around 10-100 Hz and LPF set as low as 7.5 KHz. You may also experiment digital artefacts on sound trails : it is probably due to the limitation of the capture process and the resolution that I used.
Download link
You can download the power amp IRs here : https://overdriven.fr/overdriven/index.php/download/power-amp-irs/.
A second collection of power amp IRs is available here : https://overdriven.fr/overdriven/index.php/download/power-amp-irs-ii/
2021-12-12 at 20:15
This freaking amazing, I use a preamp pedal and search a lot information with no results, until this website your great dudes!
Where I can find more power amp irs?
Cheers from chile
2021-12-13 at 22:27
Andres,
These IRs are more for experimental and learning purpose : it is unlikely that you’ll find other IRs of this type, as software and hardware vendors (amps sims, IR loaders) rather use some form of EQ curve to achieve the same results (a.k.a. Power Amp sims), probably requiring less processing power compared to applying an IR. I’d recommend using a power amp sim embedded in your software or hardware for better results ! Have fun and use power amps to get your tone !
David
2021-12-21 at 08:35
Hi, gonna totally try it, as the resonance is the missing link 😉
2023-12-05 at 06:15
Kingsley tube preamp + Line6 hx sromp into PA.
I put these power-amp IRs before YA cab IRs in my Line6 hx sromp.It‘s incredible.
Merci beaucoup!